Paper Plate Sutton Hoo Helmet
This is an idea I’ve played around with for a while, I could see how it would work but I wanted to try to find a method that would use all of the paper plate, what I call ‘pure making’. The design I use is quite complex but even just the first part of it would be enough for younger children to use as a basis to build on.
The basic blueprint
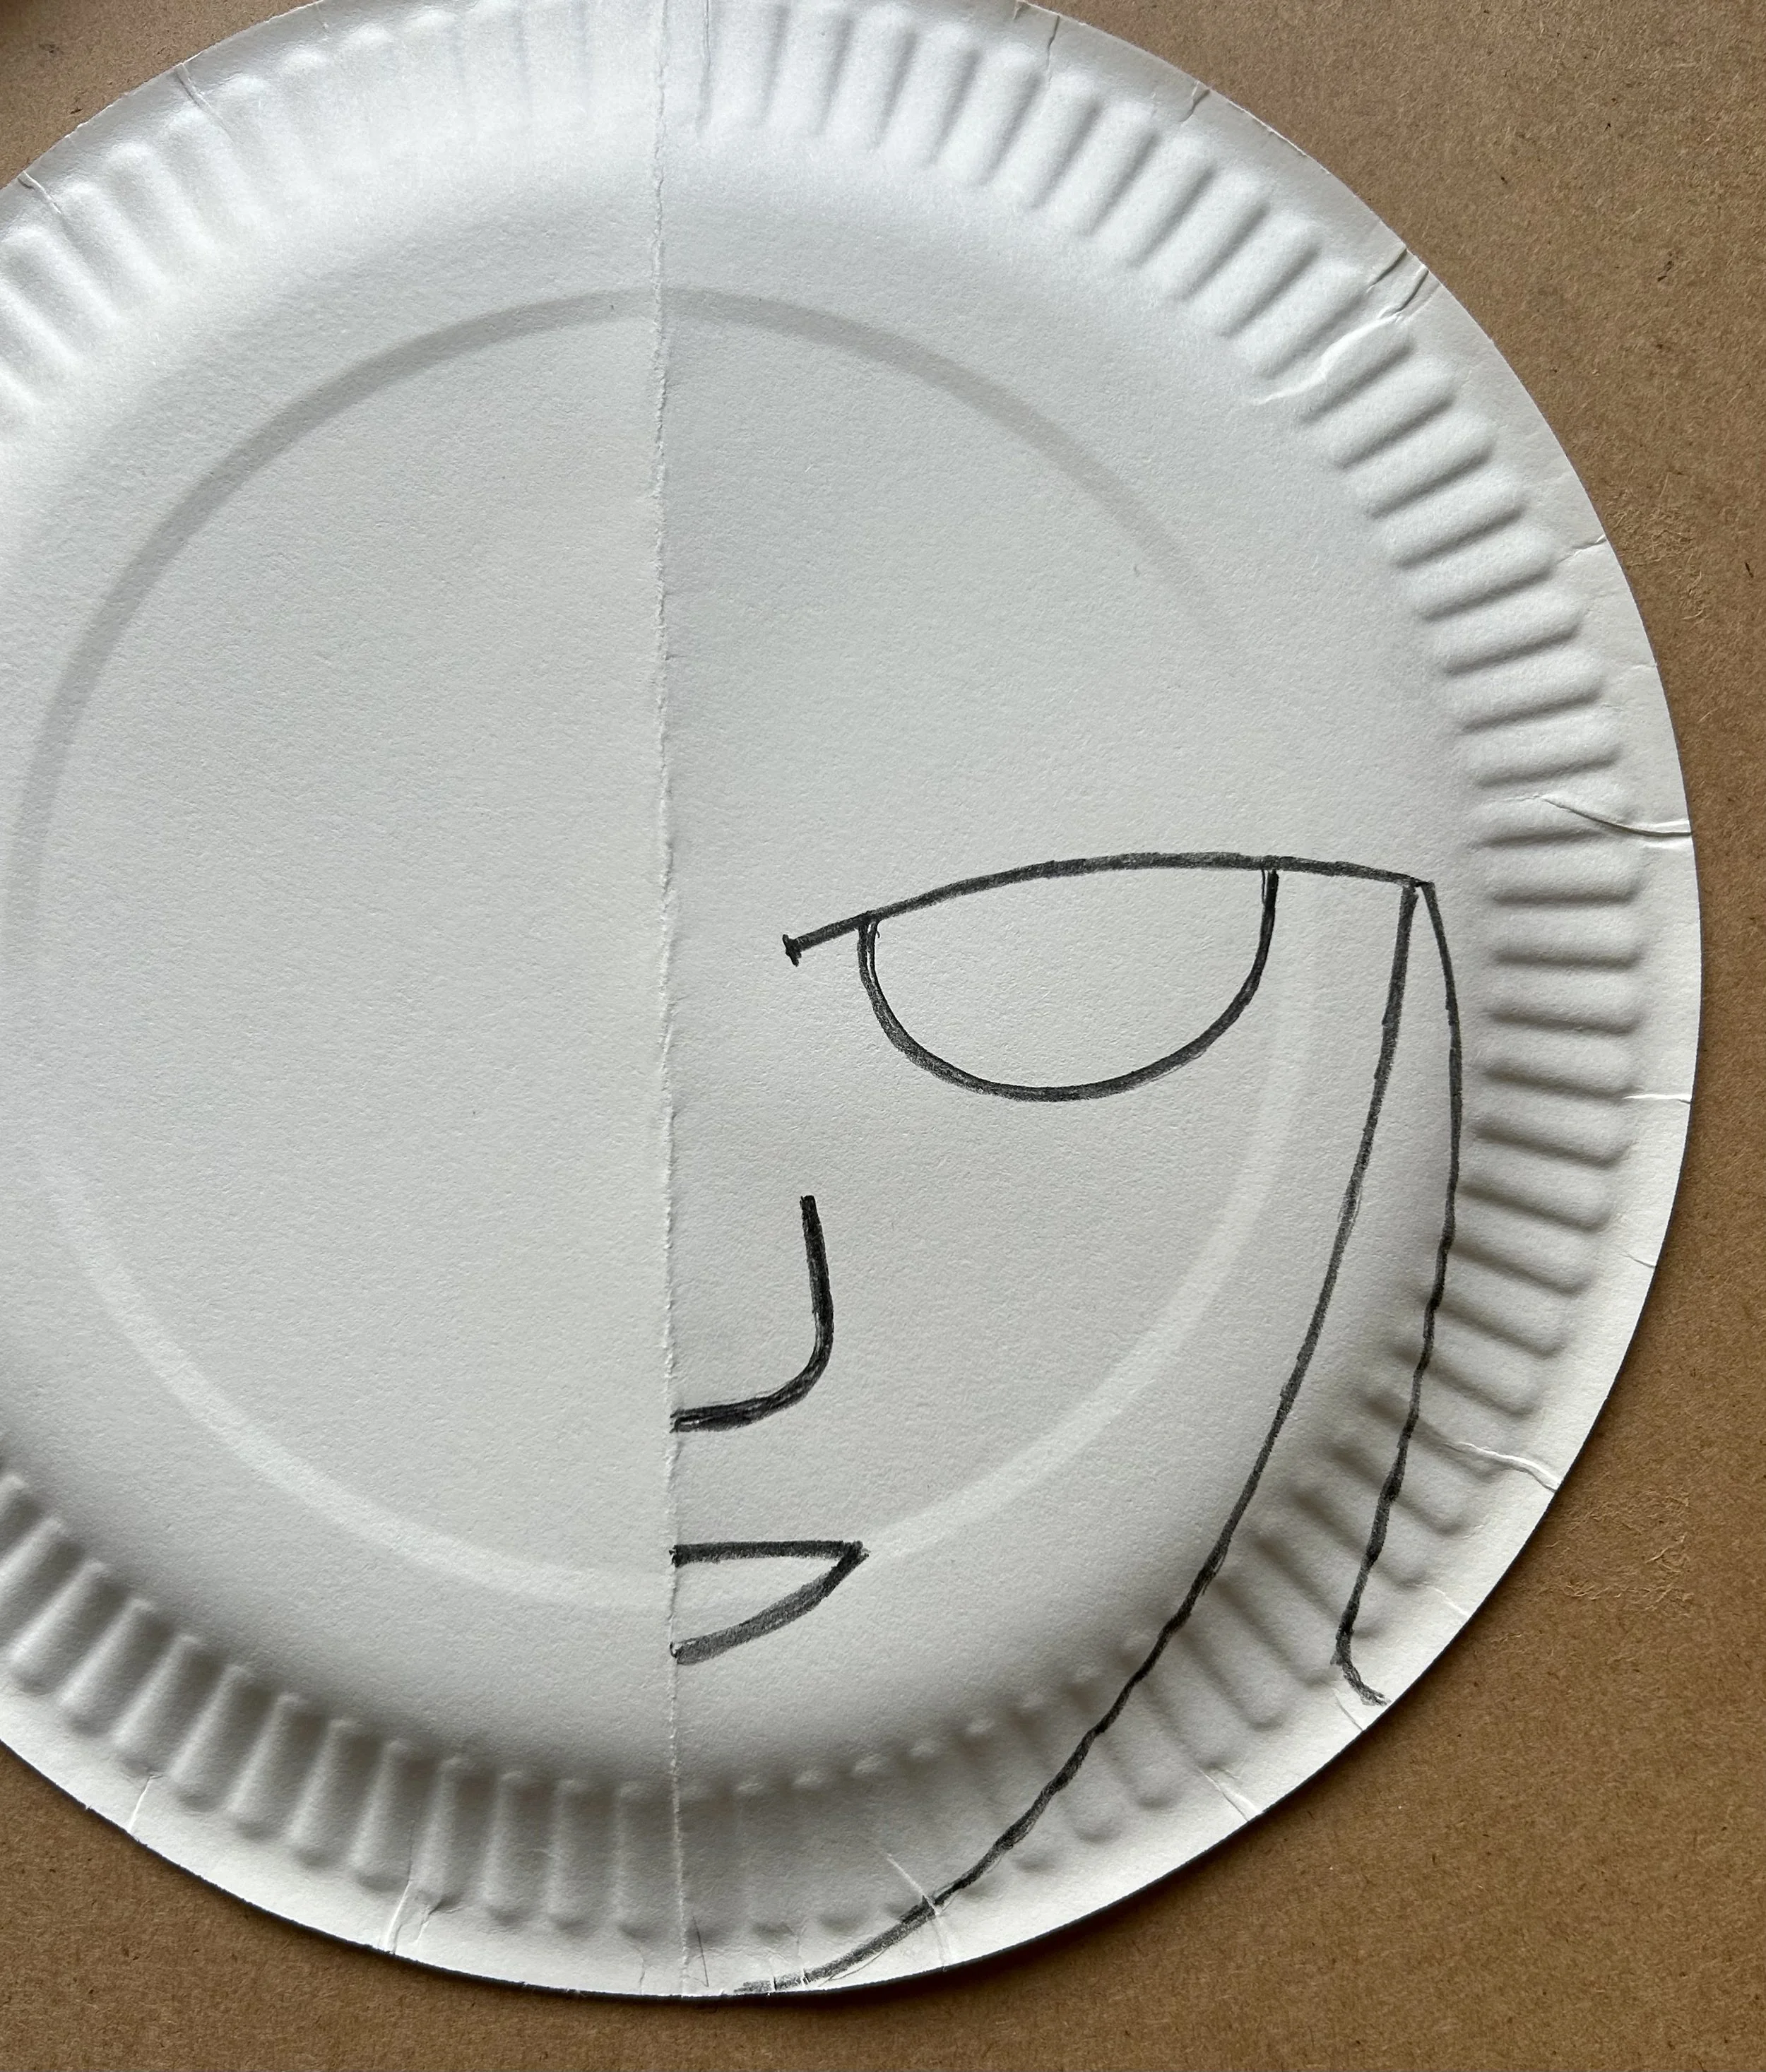
Obviously the plate needs folding first as the ‘mask’ is symmetrical. Then you just need to hold it folded together and cut along the lines, removing the eyeholes, the small mouth, and the pieces that define the edges of the face. Where the eyes are, the cut needs to go a little further in towards the bridge of the nose, as shown in the above photo.
The initial design showing the pieces that have been removed.
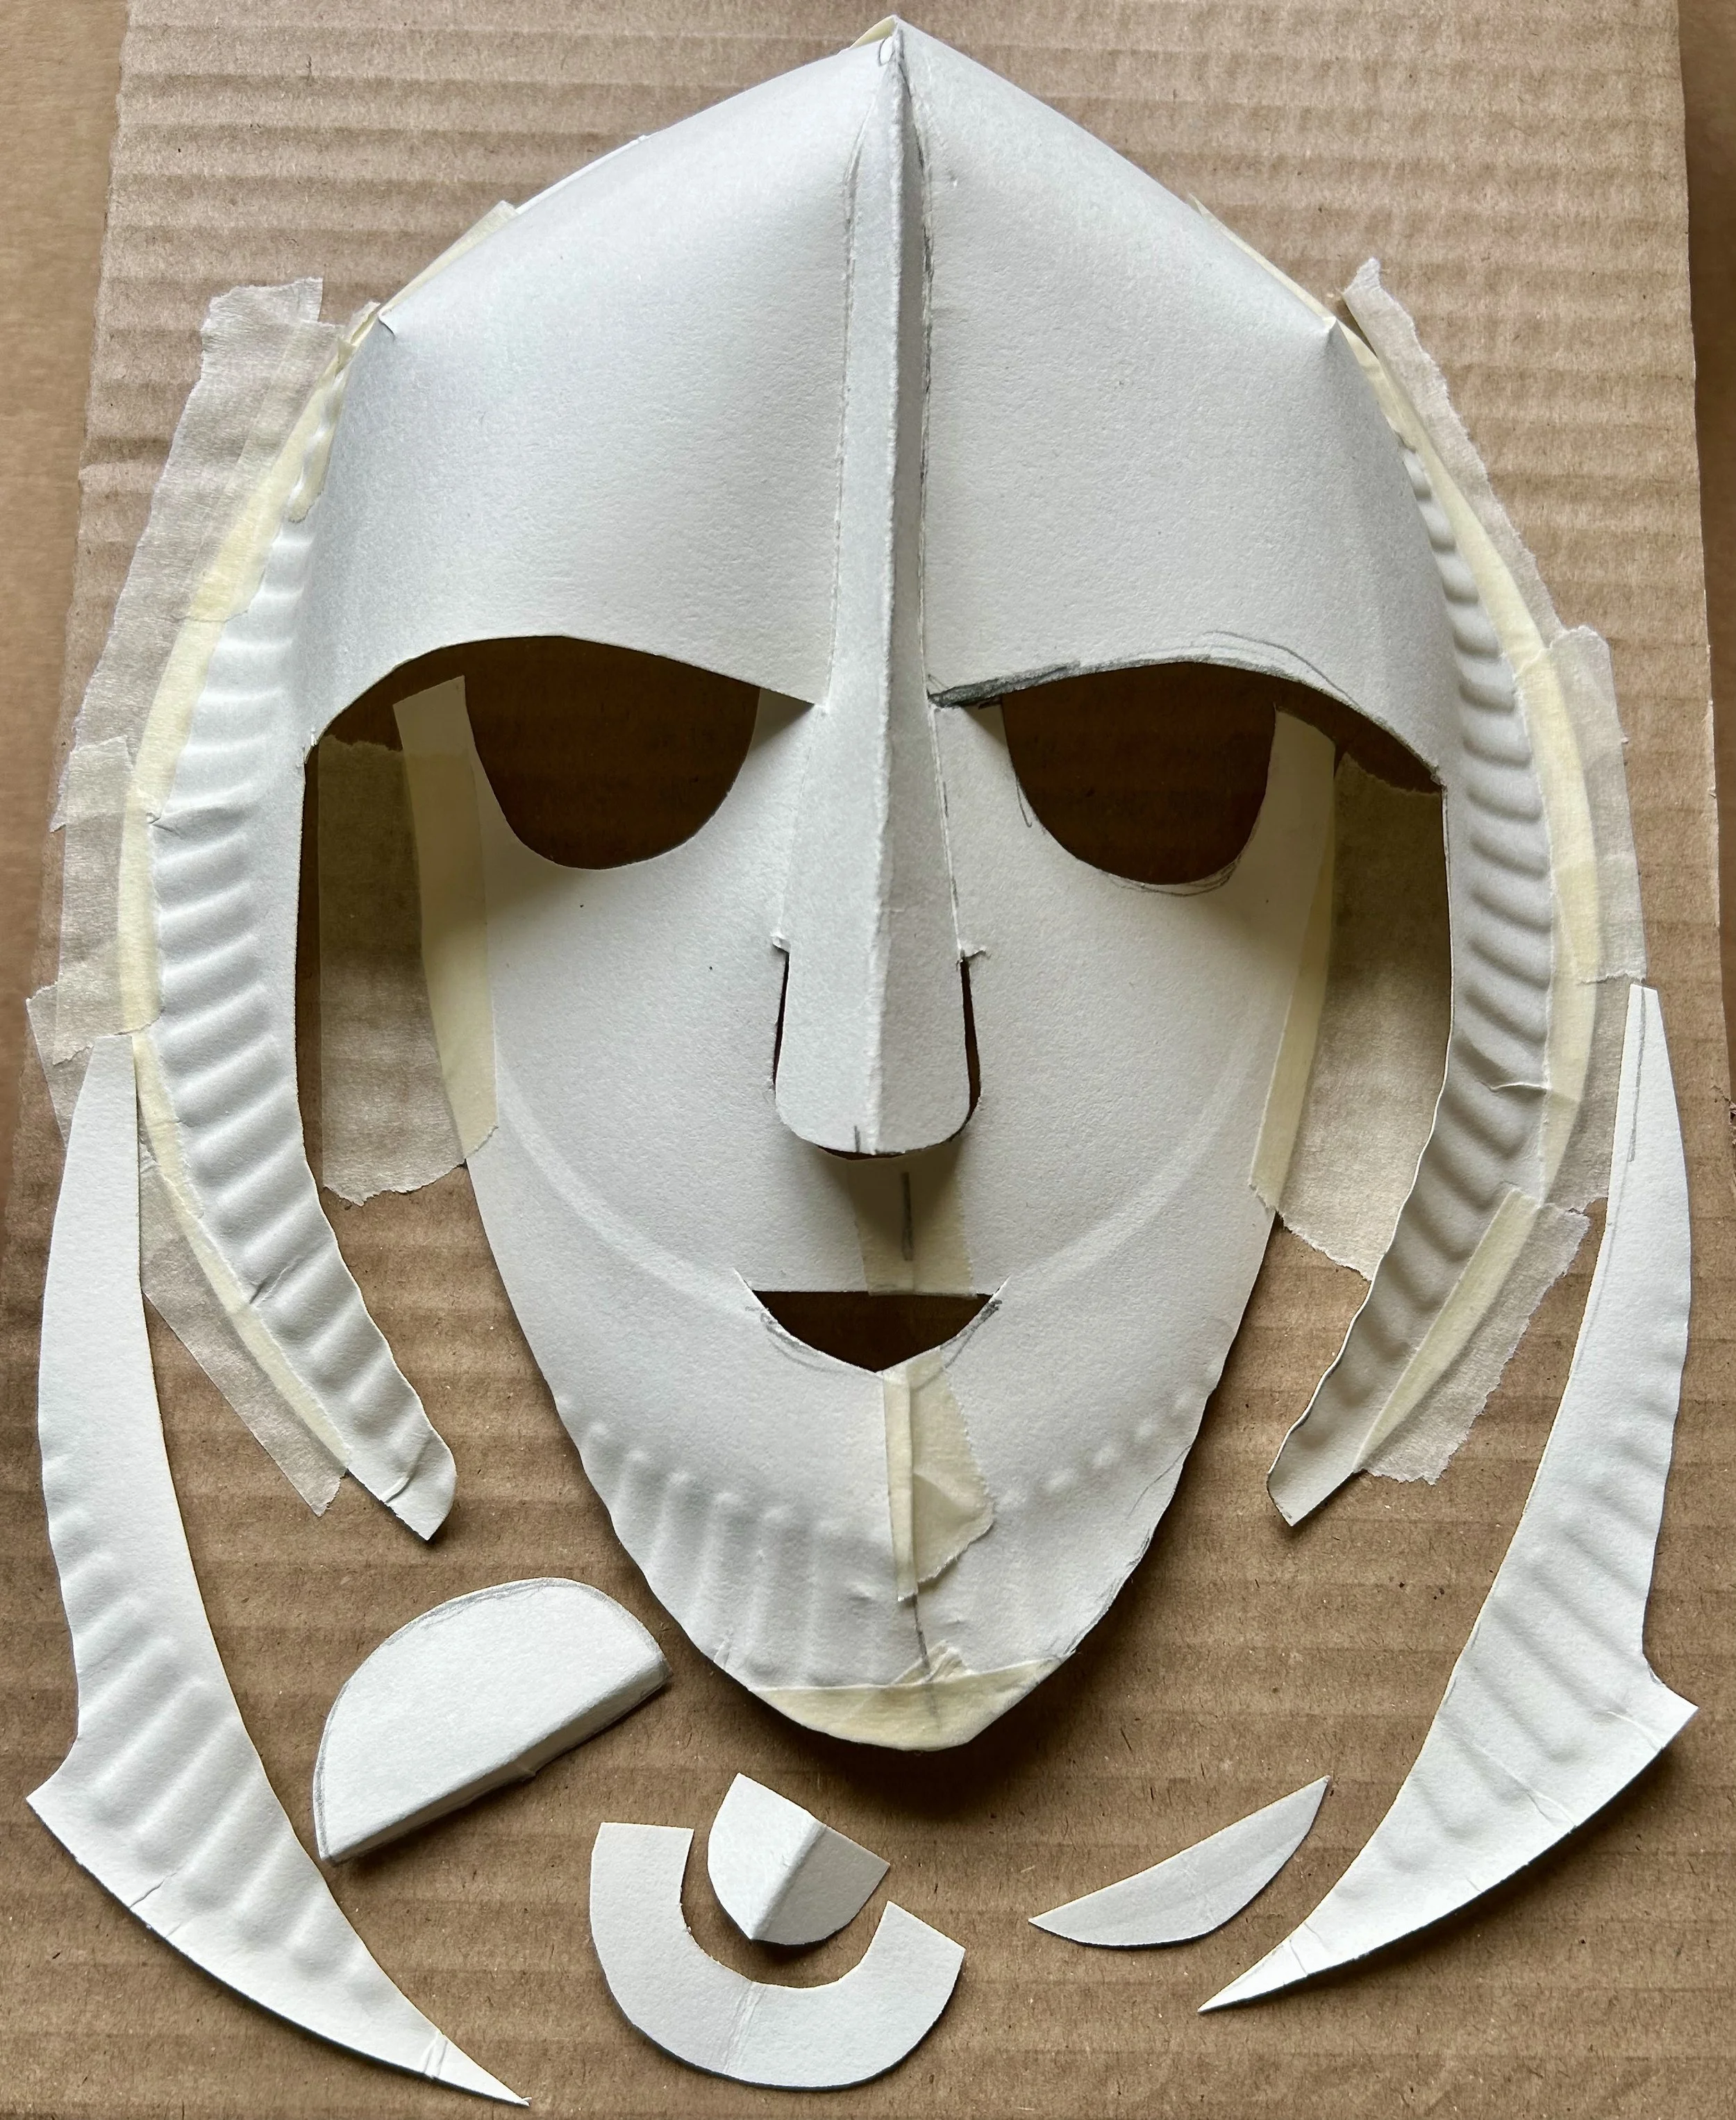
The next stage is to cut up through the centre of the chin and up the upper lip to the nose. Also, make a slit down the centre at the top, from the top of the head to where the plate has a rim. Finally, use your scissors to ‘scored’ a line from the forehead to the nose on both sides, along the dotted lines in the photo above.
The basic shape taped together and fixed to a cardboard base.
If you overlap the lip and chin parts it will make the face become more 3D and also will ‘pop’ the nose out, you can see above where I’ve taped those pieces back together to hold them in position. You can also ‘slide’ the slit at the top of the head together to make this rounder. I’ve also added another couple of smaller slits on either side of the head and done the same. (you can just about see them above at ‘ten o’clock’ and ‘two o’clock)
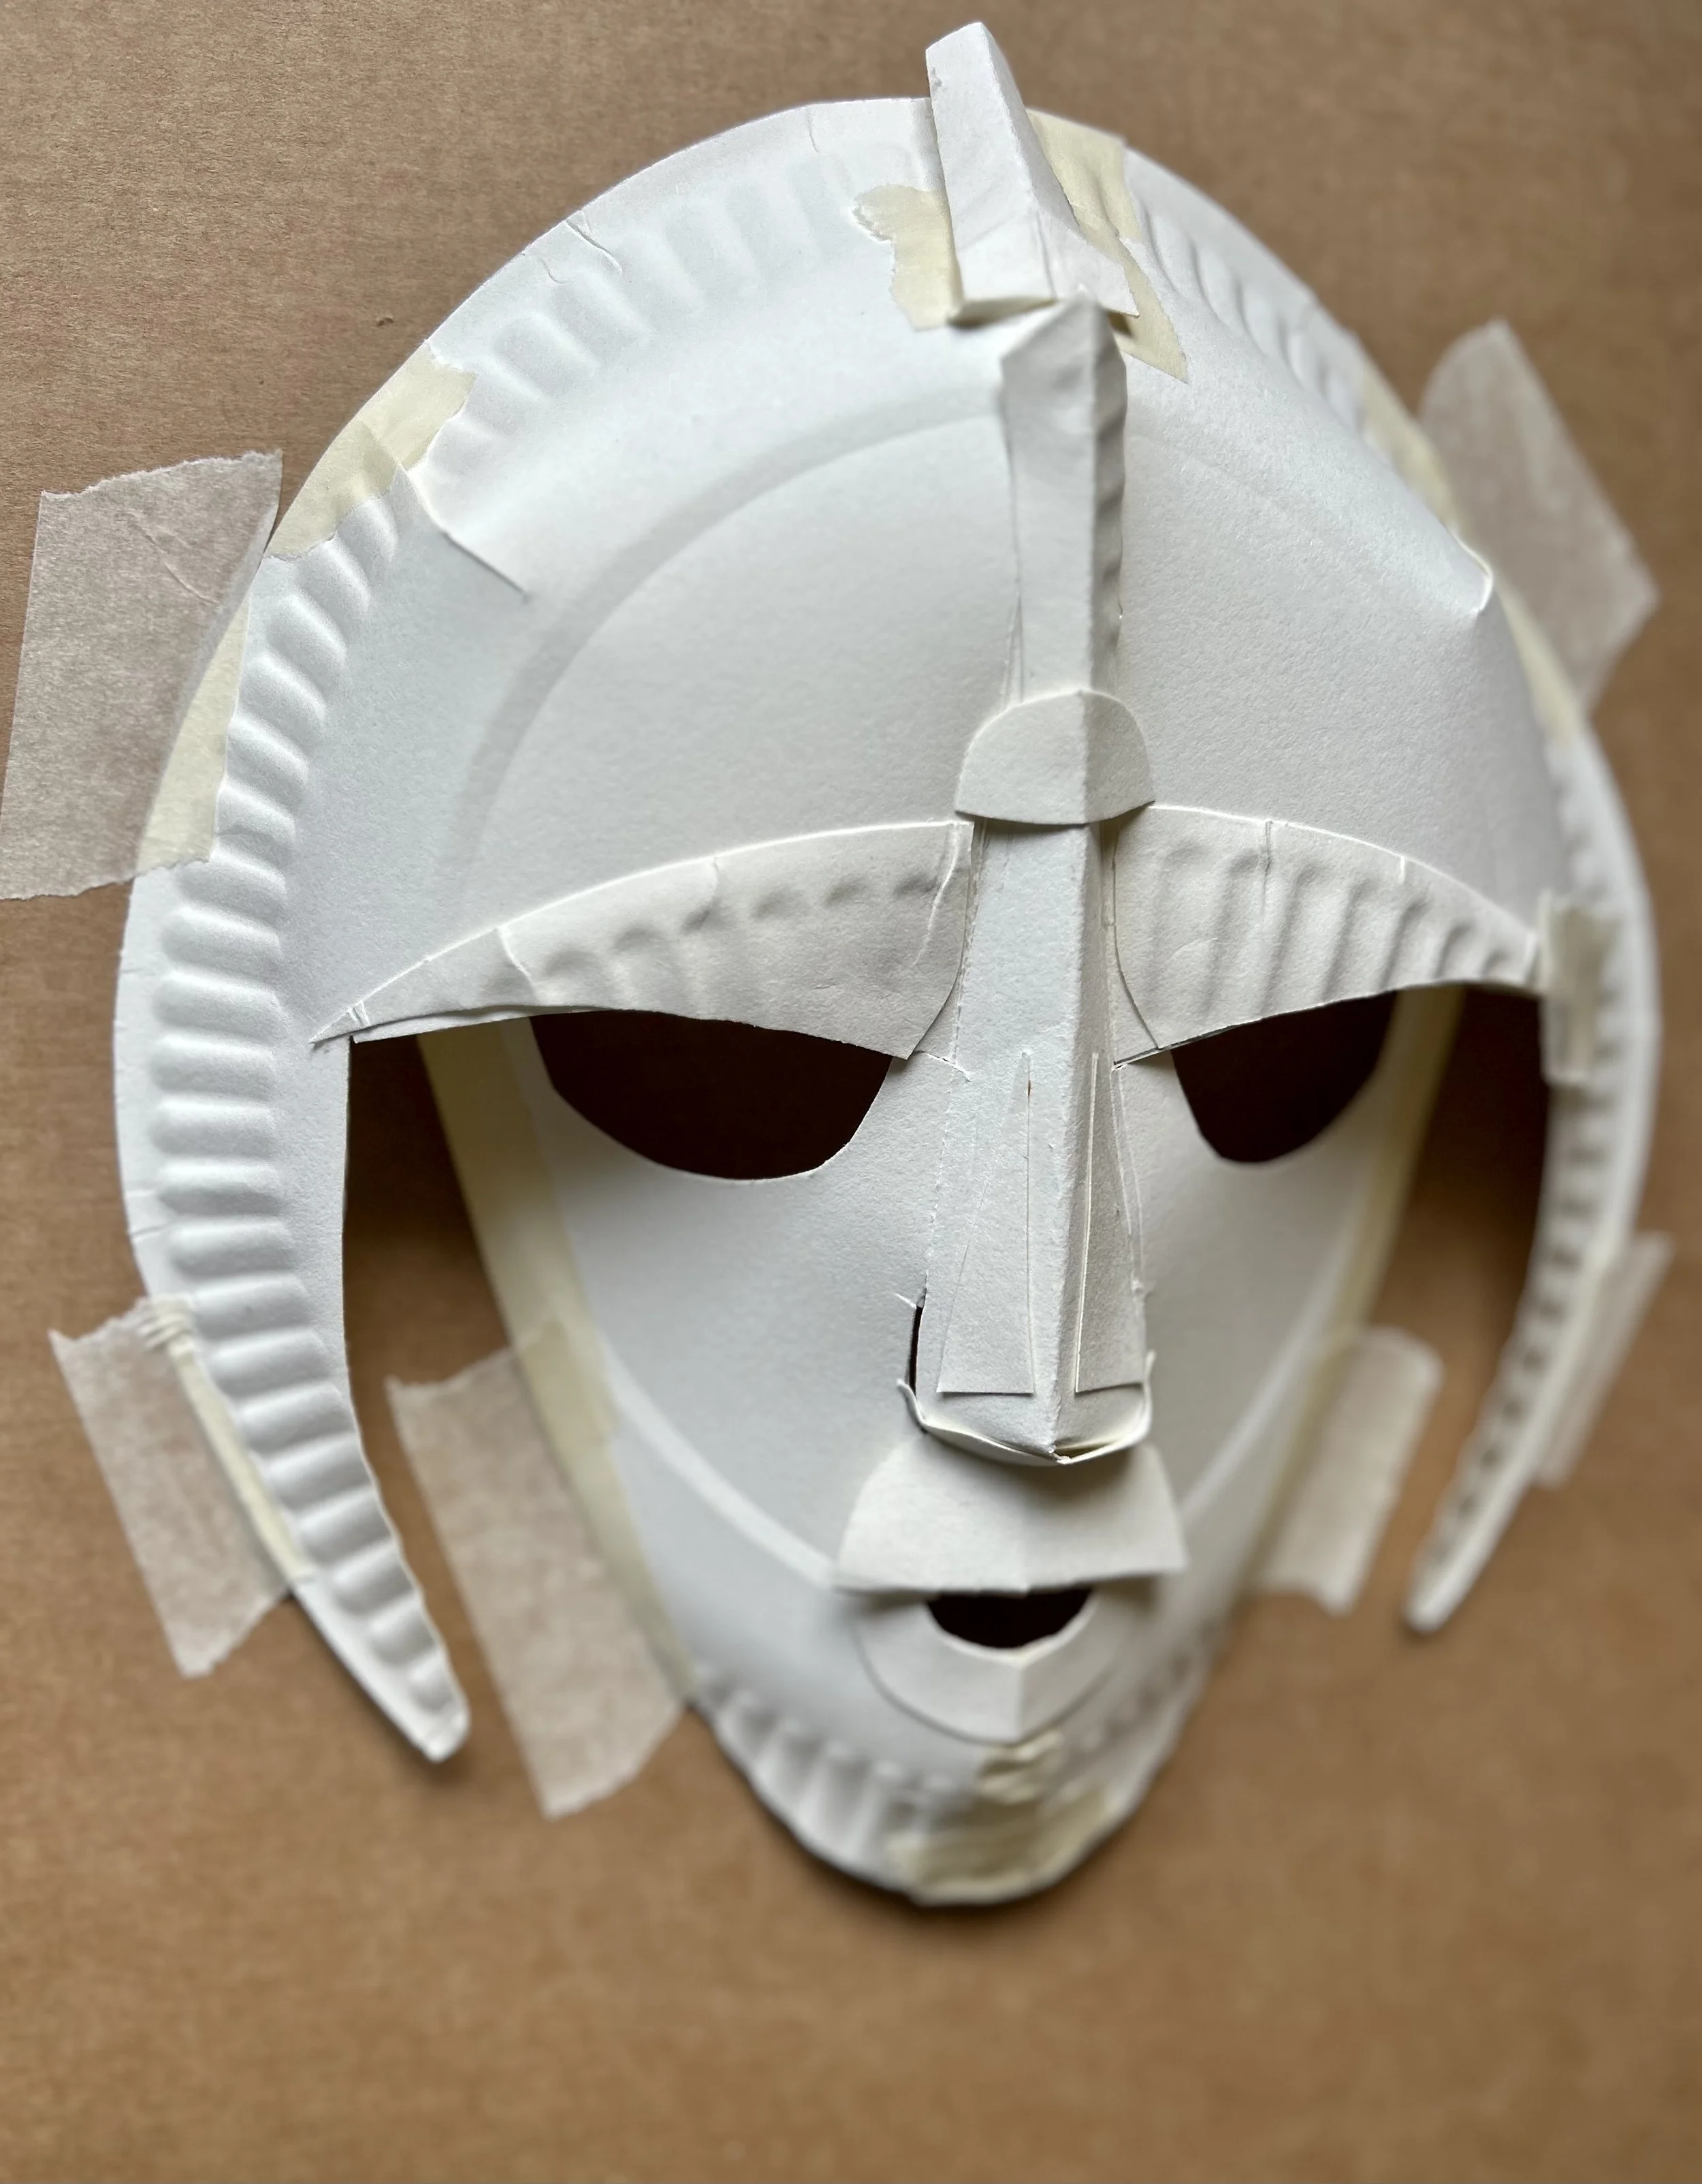
I’ve also cut a semicircle out of one of the eyehole pieces, ready to use the ‘rainbow’ shaped piece for the bottom lip.
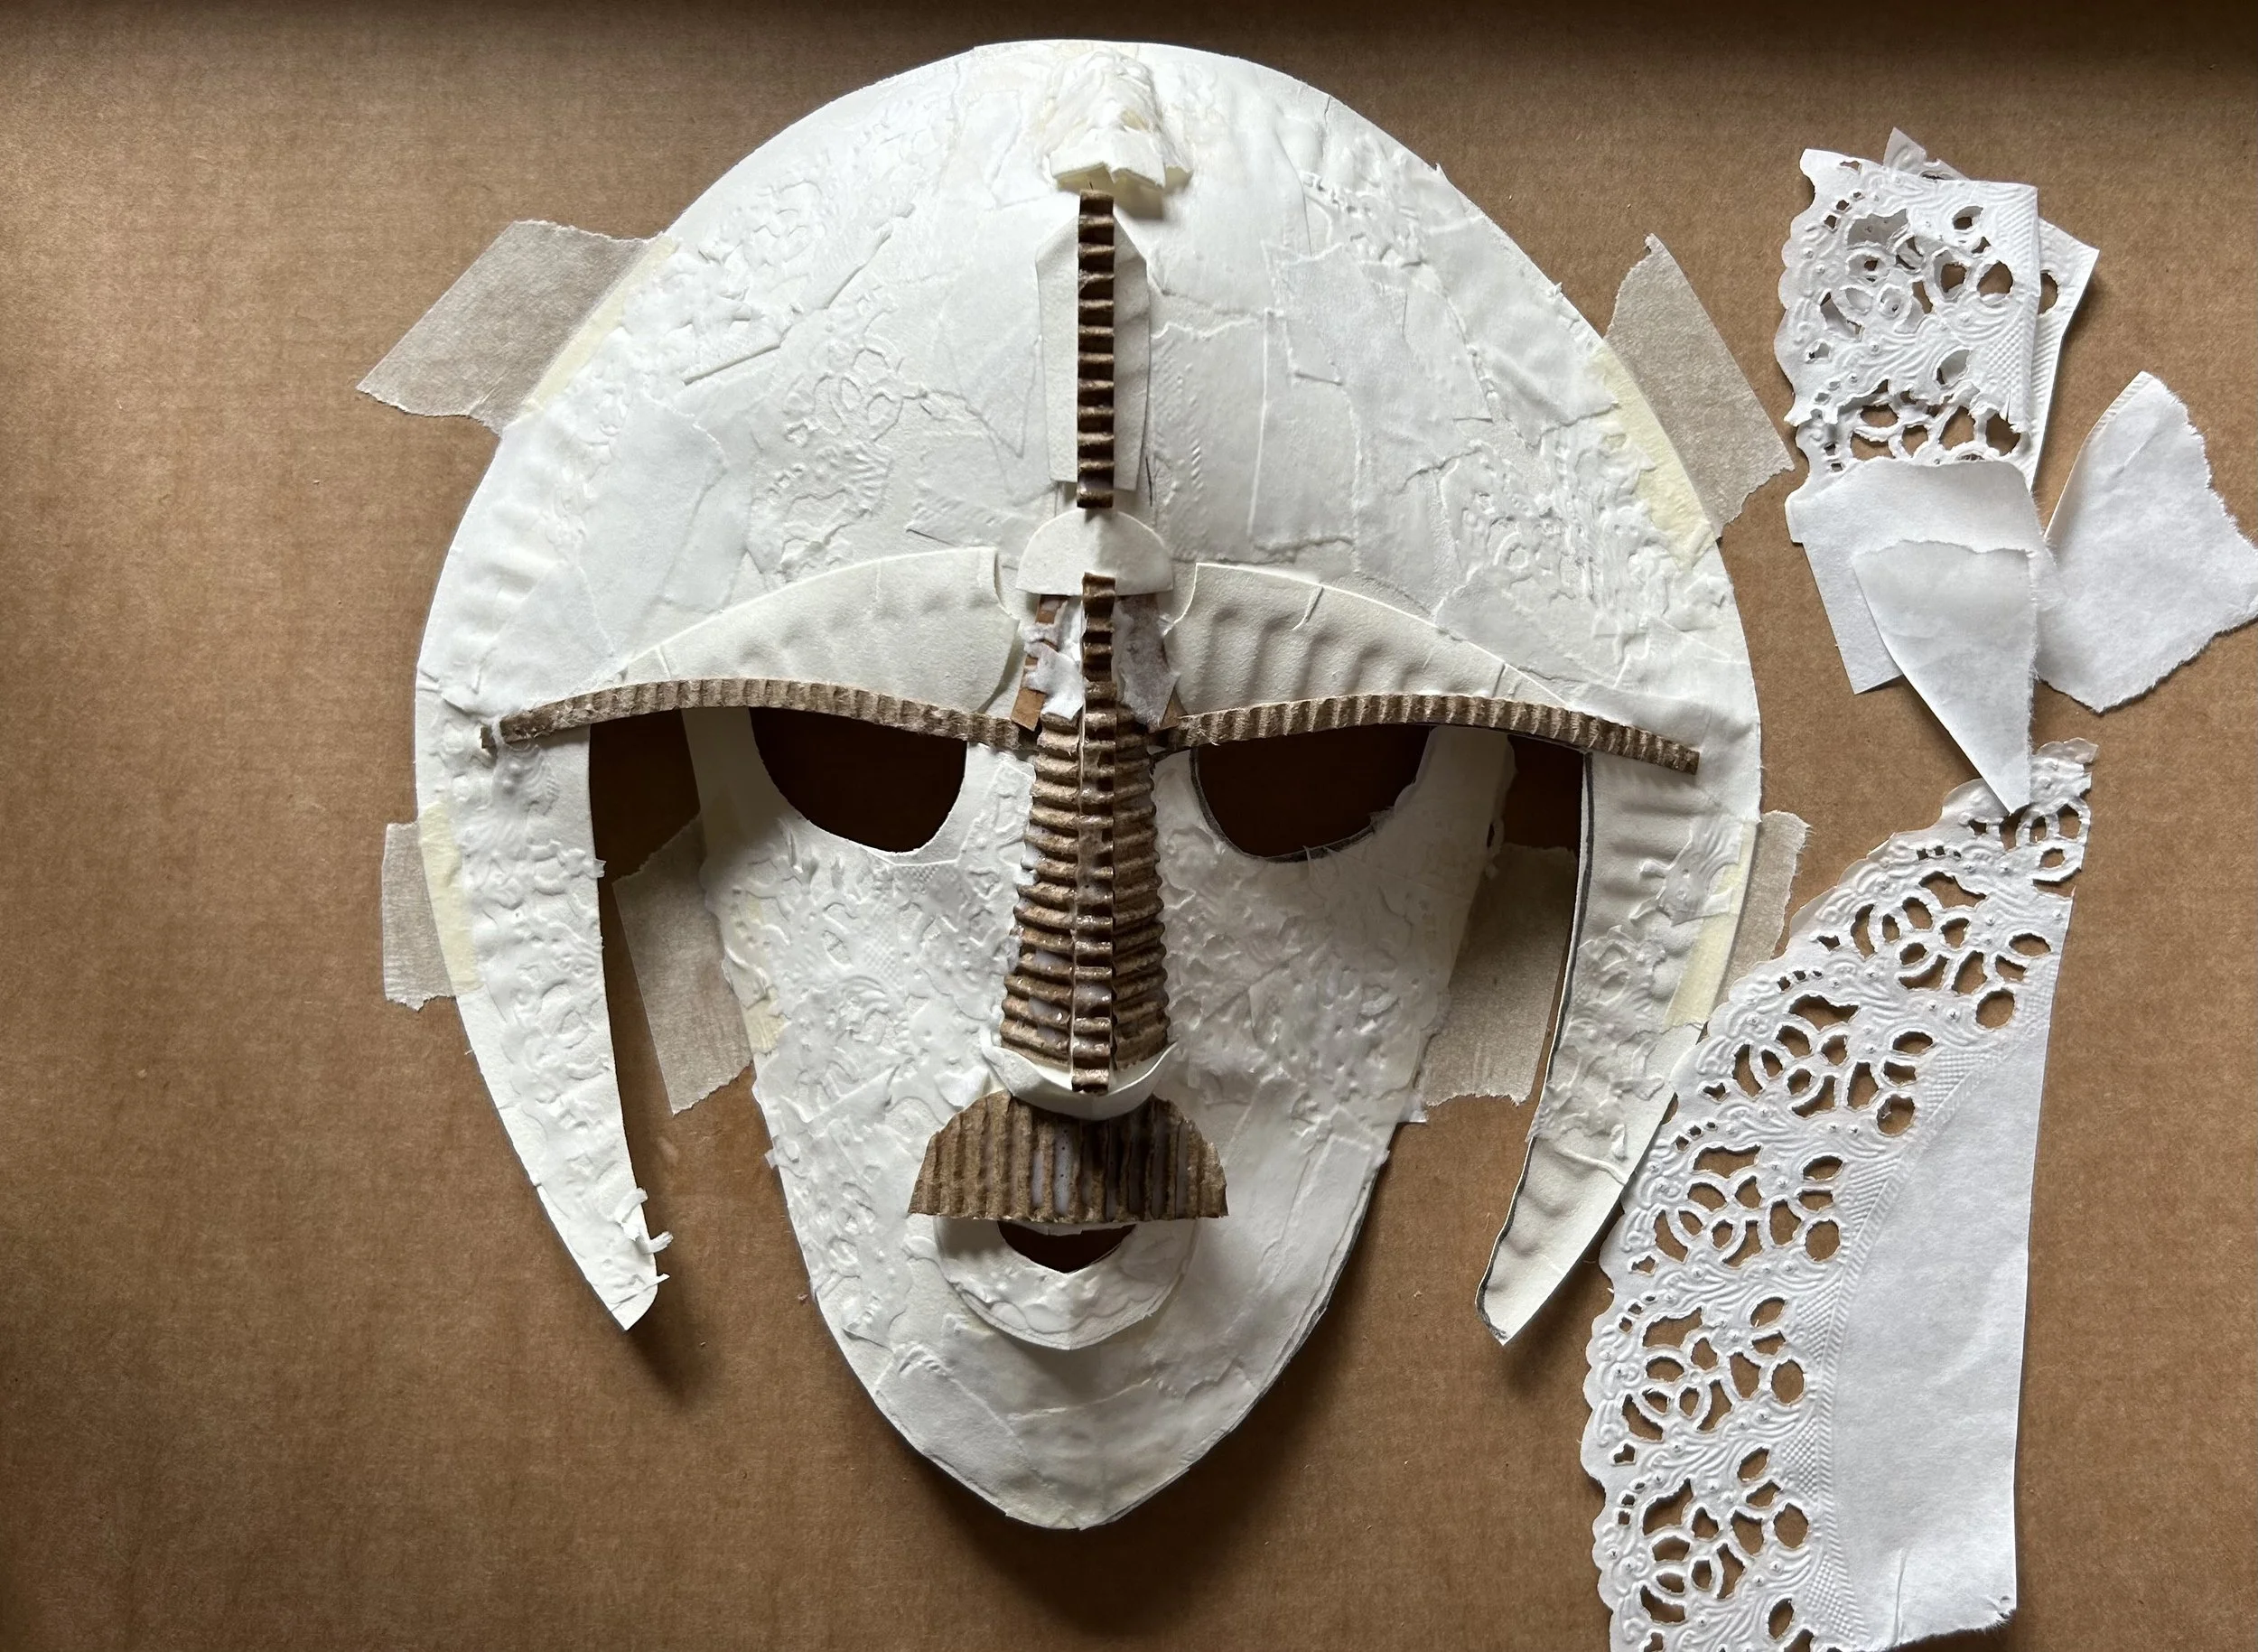
You can see above how the lip is glued on, then the other eye-hole piece is used to make the moustache, you might need to slightly fold over the bottom edge of this semicircle to make it thicker. I’ve also used the small slice taken out from the mouth and reattached it to strengthen the underside of the nose. Then the final two pieces have been cut to make the eyebrows, two thin triangle to glue onto the nose, and then the final remaining pieces have been folded lengthways, and glued down the centre of the forehead to make the decoration. The small leftover semi-circle has been used here too, so there’s no waste.
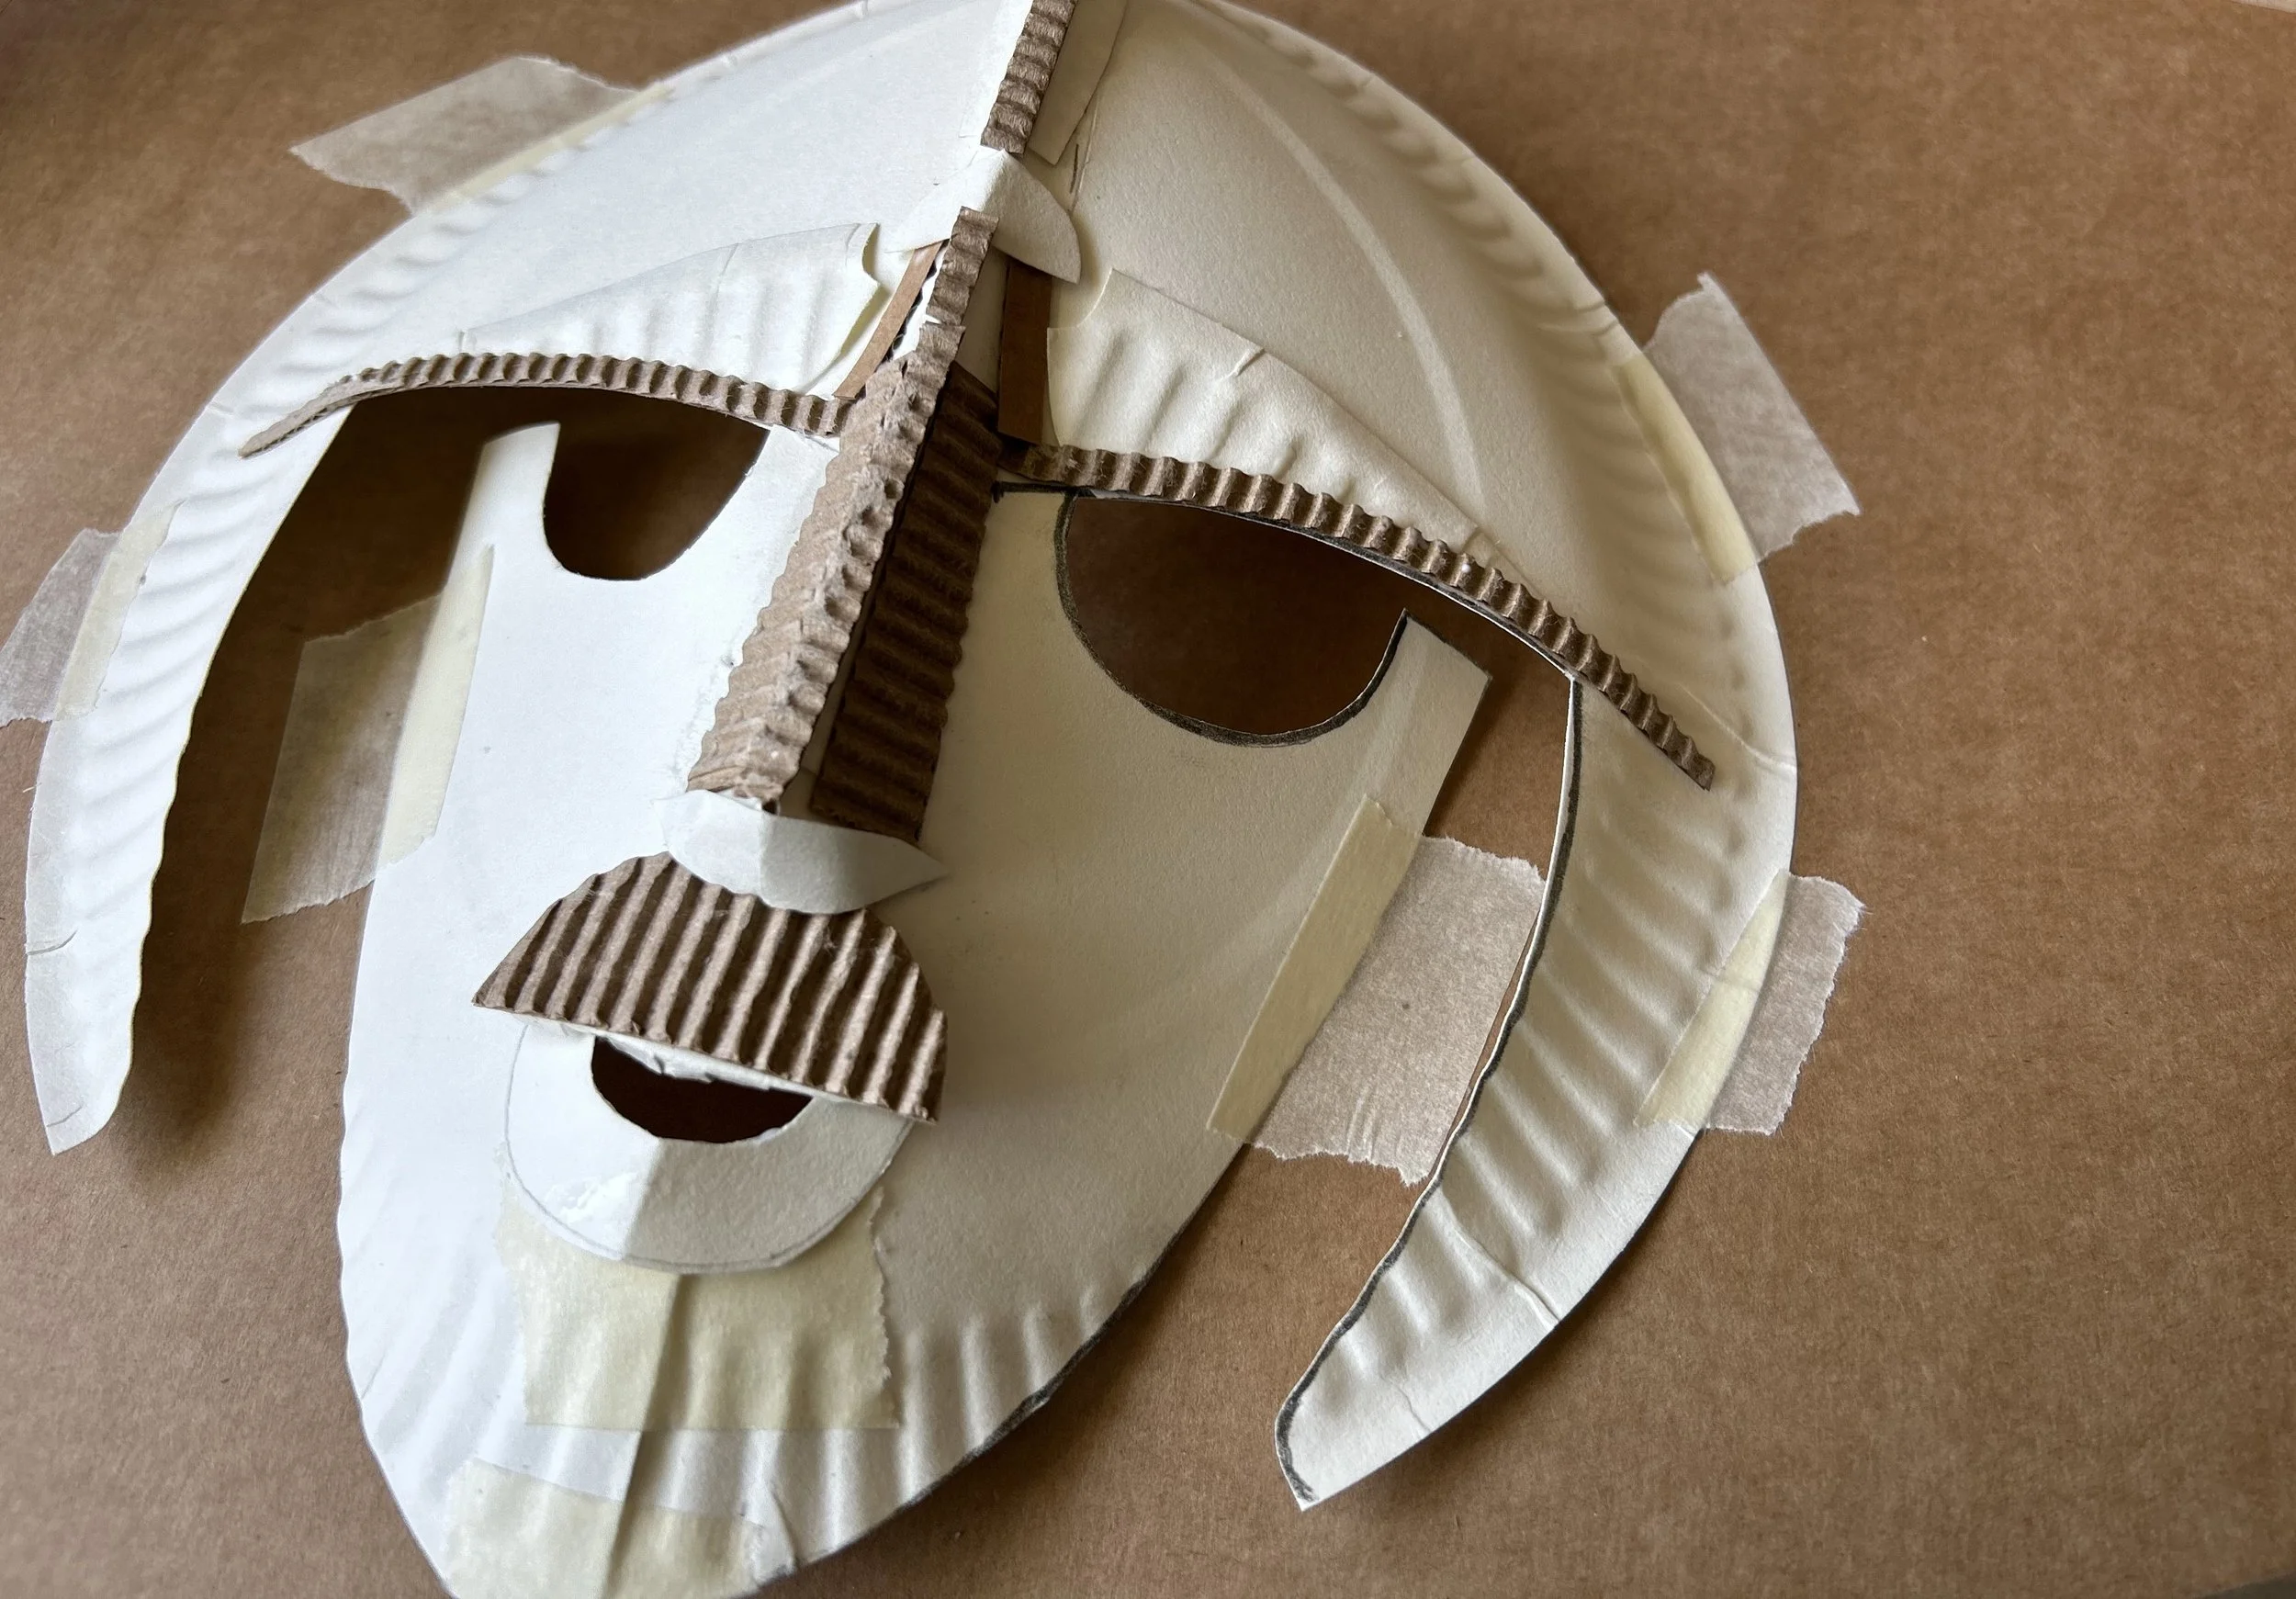
Using scrap corrugated card for details.
The decoration on the original helmet looks very similar to the texture of corrugated cardboard, so a little of that can really enhance the design and make it look more authentic. If you don’t have any you can just rip apart some ‘box cardboard’ and use the internal structure, that’s what I’ve used here.
Using cake doilies for texture.
You could use any thin paper to paper mache and strengthen the design, I’d normally just use tissue paper, but for this design I wanted to recreate the intricate incised patterns on the surface. On the original artefact these patterns are worn down and damaged so I’ve just pasted on ripped up pieces of cake doilies to suggest the texture.
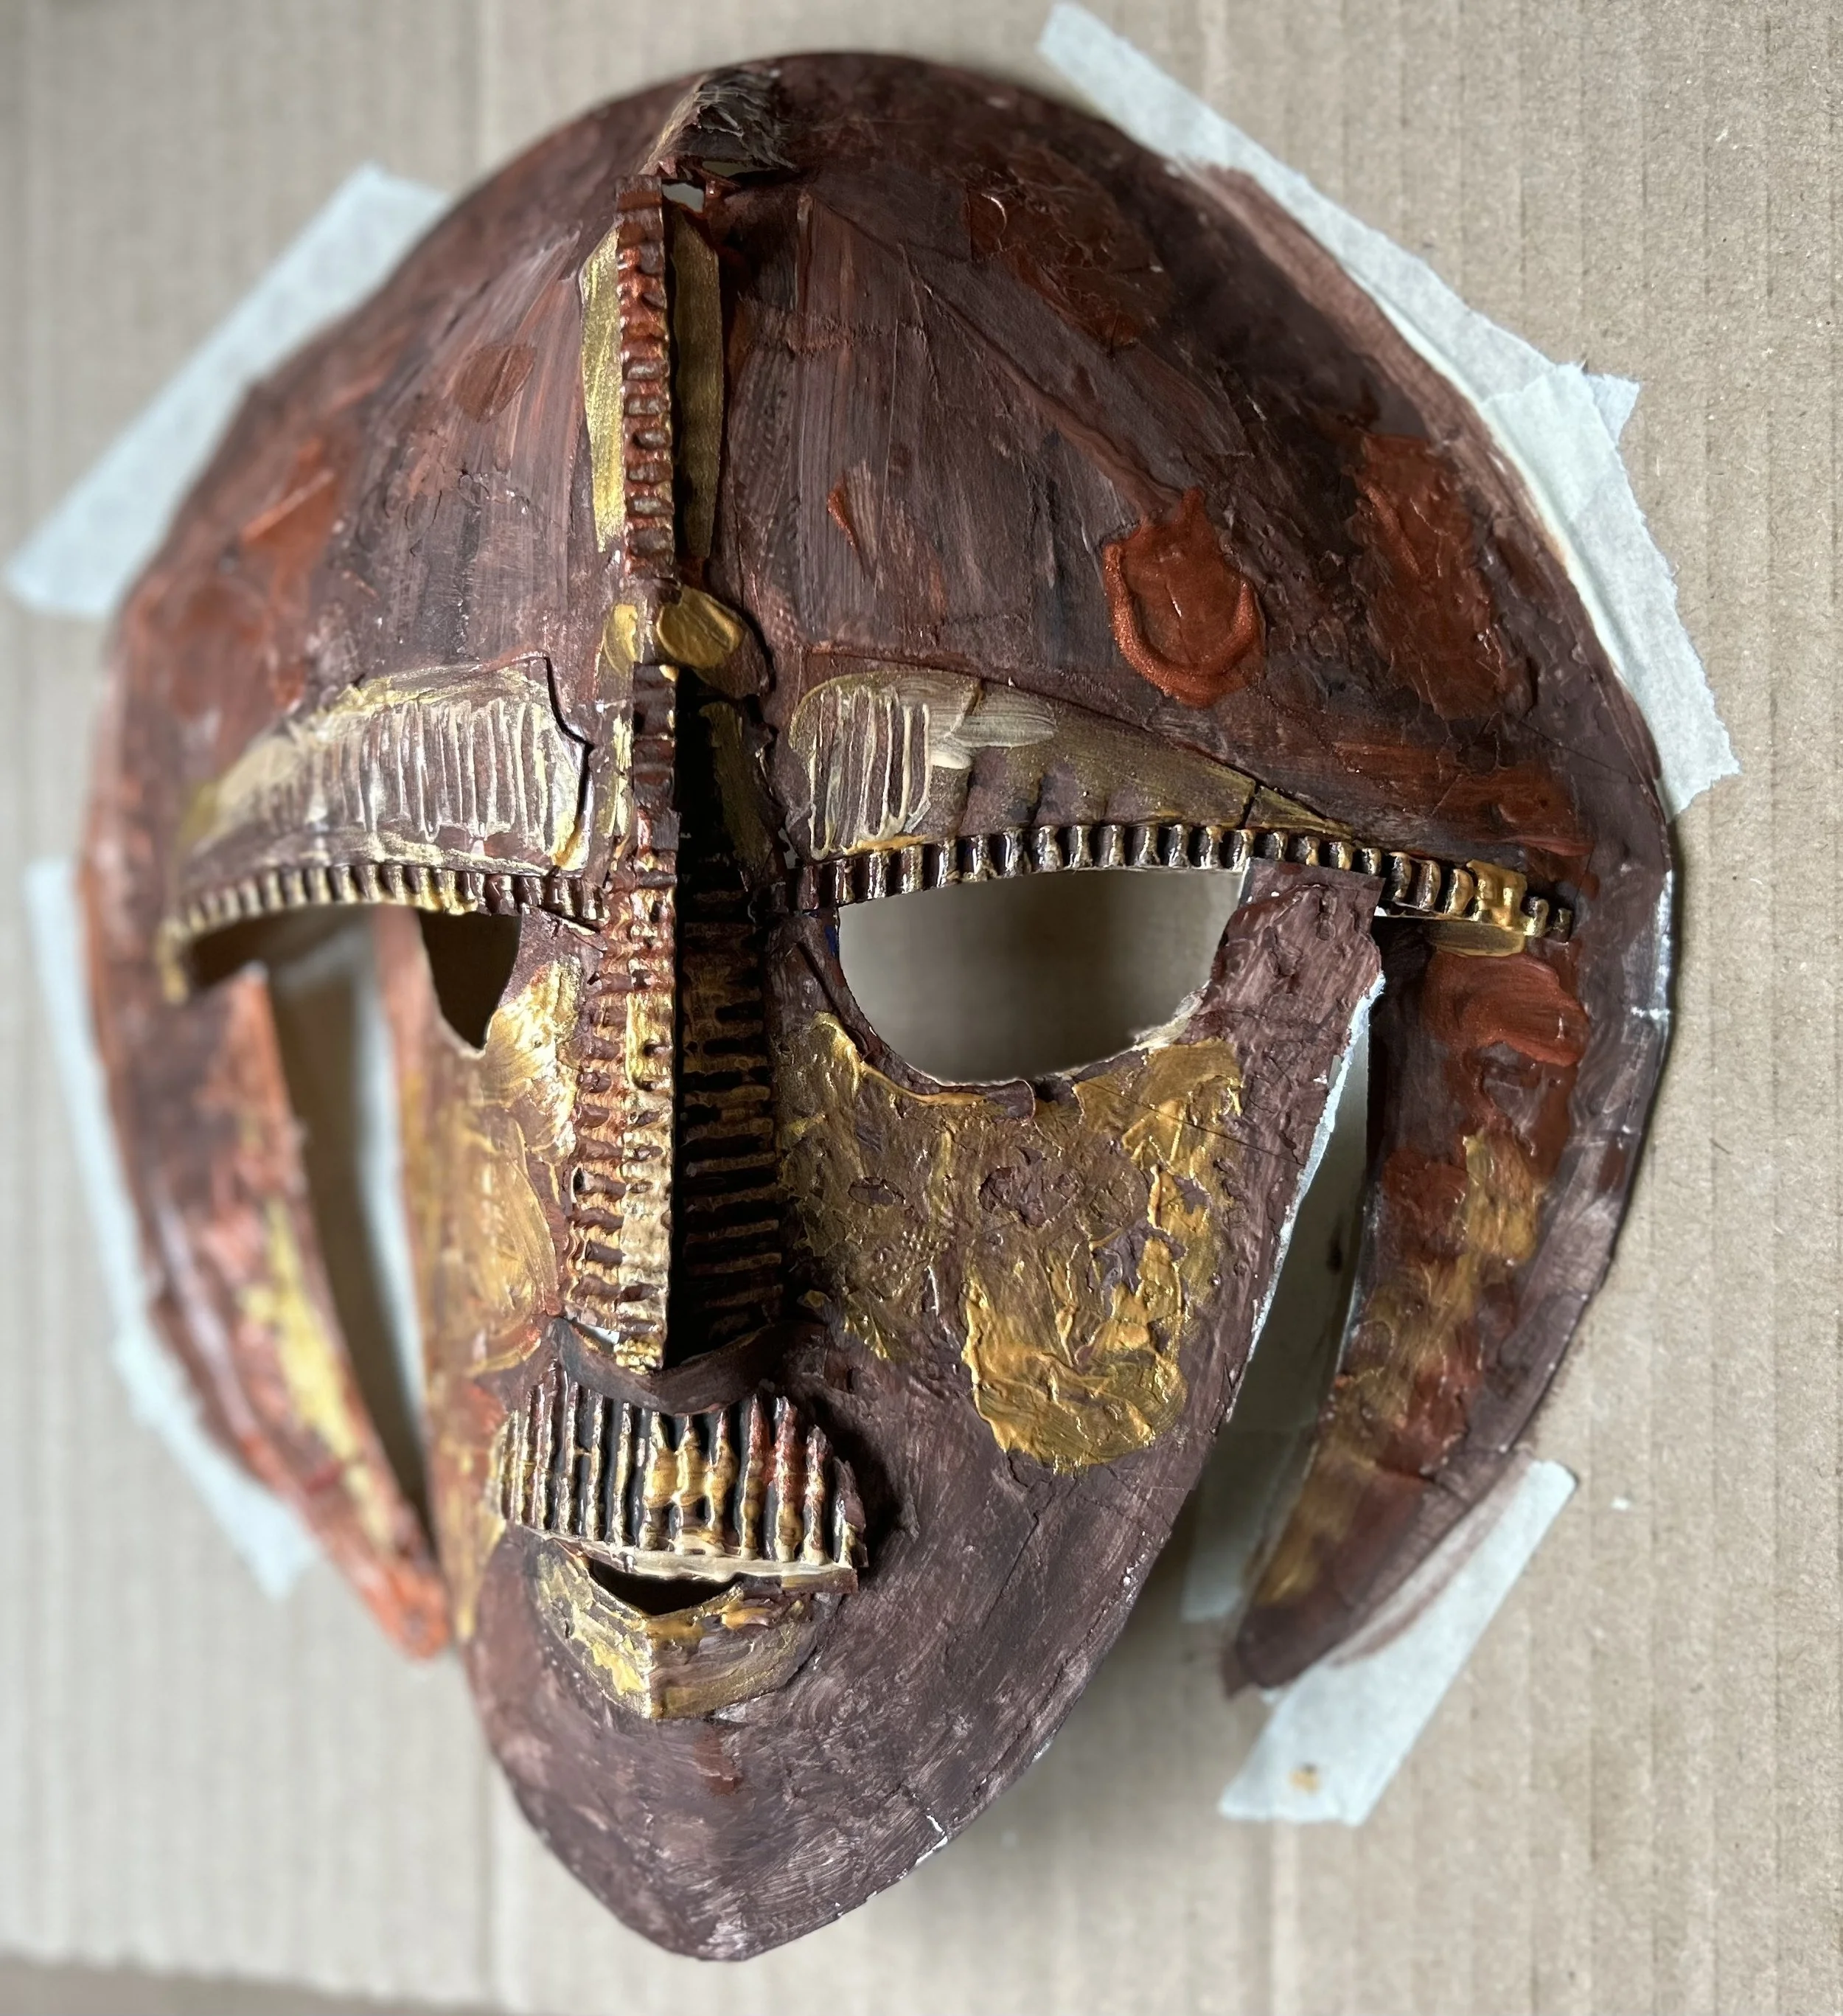
The final piece.
Finally, once the surface is dry, the helmet can be painted. Like many of my models, I’ve painted a rough undercoat on first, in this case using a dark brown paint. I’ve then quickly added some slightly lighter highlights while the paint is still wet, and then I’ve used some gold metallic paint to add on the details. None of this has to be too neat in this case due to the patina and age of the subject matter.
The video below gives an idea of how this project comes together and hopefully helps to explain why some of the stages described above are helpful.
If you wanted to make this whole project simpler for younger children you could easily just make the initial shape, then add some corrugated card details such as the eyebrows and moustache, and then add the paintwork. The paper mache stage only really offers a bit of extra strength and texture, and using the offcuts from the plate is just something that I like to do to avoid wasting them, you can always recycle them, they are only paper.

